Tuesday, November 13, 2012

Humble pie

Hello dear followers.  I am alive and well and getting back in the saddle after a week-long intensive botanical art workshop with Anne-Marie Evans.  Yes, THE Anne-Marie Evans, a veritable phenom in the botanical art world.  She is constantly on the road giving workshops around the world and I was lucky enough to participate in one organized by Botanical Artists for Education and the Environment.   I took with me several scanned copies of my finished pieces as well as our friend, the flame azalea, for her professional critique.  We were to arrive ready to work on something new, so I took preparations for that, as well.

Suffice it to say it was an intense week. Anne-Marie is an incredible teacher.  She gets right down to business; so even though we were coping with the power outage effects of superstorm Sandy, we cobbled together enough flat surfaces and light sources temporarily in someones living room to begin working as soon as the storm would allow.  When she critiques, she really critiques.  (She reminded us, "After all, you are paying me a lot of money to be here, so I give you the full and unvarnished truth about your work.")  Her practiced eye kept finding errors in my painting: places where the detail was inaccurate or the color was all wrong.  As soon as she drew my attention to the problem, I'd see it too, and wonder why I hadn't got it right the first time.  At the end of each day I would sadly pack up my things, ready to throw in the towel on my composition (Why did I tackle something so enormous and difficult??).  And I'd slink back to my lodgings completely deflated.  (To one of my classmates she said: "I know I'm fierce.  I've been known to bring artists to tears!")  But by the next day I was ready to try again, and I'd get to class even earlier in the hopes that extra time would work to my advantage.  Somehow, some way, I was determined to succeed.

I was working on a specimen of Swiss chard:


And while she was very pleased with my pencil drawing:


She was not impressed with my early painting. 


I think I was nervous, to tell the truth.  Can you imagine bending to a task and having The World Expert hovering over your shoulder watching you work?  She kept questioning my rush to work on color before the form was fully set down.  On Wednesday, she suggested I add a study of the root system to make the painting more interesting, so I had to go home and dig up one of the other plant roots in the pot without killing my subject:  


and then somehow fit that into the composition:


Long about Thursday, she realized I really did know what I was doing; I just went about it a different way than she does.  This helped us a bit.  Finally her words made sense to me and I began to achieve the effects she was describing.  On Friday I decided to get her advice on my flame azalea.  I thought I was nearly done, but au contraire!  So much to correct and redo!  So much more depth to convey!  And I can't tell you how many times she walked by my table reminding me to dull the garish leaf color.  ("But it's a spring leaf!" I kept screaming inside my head...) By Saturday I was exhausted but thrilled with all I had learned.  It has been a long time since I've taken a class; and I think years of basking in the glow of my family's praise has kept me from refining my craft.  Now I think I've taken my skill to the next level, really. 

See what you think:


OK, I know.  I do still have to increase the intense tones to convey the depth more.  And fix the width-of-the-stem issue.  And paint the stamen ever so delicately and with varying detail and strength of color to convey aerial perspective.  But maybe, just maybe, this painting can be salvaged after all.

And then I'll get back to the Swiss chard . . .

Thursday, October 25, 2012

Short strokes

Hooray!  I am down to the short strokes, as it were. 


Here's what is left to do on the To Do List: a little more darker shading in the flowers with the teeny weenie brush, a bit more definition in the stem, and the stamen (remember them?)  Almost to the finish line!!!

Tuesday, October 23, 2012

Mock Orange

Since we are talking a lot about orange these days, allow me to share with you my most recent "Musings -- in the garden" essay.  My painting session today was not terribly riveting, so you aren't missing anything earthshaking on that front.

And so without further ado:


Mock Orange
Something has gone dreadfully wrong with my fruit trees.  I bought the tiny twelve inch saplings for $9.00 each at Lowe’s on special.  This was my first mistake.  But how could I resist the thought of kumquat, Mandarin orange, lemon and tangelo trees gracing the pool deck in summer and perfuming my sunny studio in winter?  I brought them home and lined them up for inspection.  Everybody looked healthy, and so I planted them in matching pots and set them outside for their first summer.  No blooms, but plenty of green leaves happened.  And then they came inside to spend the winter with me in the studio. So far so good.  After a month or so, a couple of them even bloomed!  How thrilling!

It must be said that I am not too successful with houseplants, and all the pests in town know it.  Soon I had the local tribe of aphids and spider mites move in, and that was the end of the flowering season.  Still, by the end of the winter, I was delighted that one of the trees, the Mandarin orange, had managed to set two fruits!  There they were, little green balls at the end of two thin branches.  To be honest, I can’t really call them branches.  Twigs is more like it.  I wondered how they would be able to hold up the mature fruit, but figured they would likely be sort of miniature sized, on account of the tree’s young age and all.

Summer rolled around again and out the trees went to the pool deck where it was nice and hot and Mediterranean-like.  They loved it.  More green leaves happened plus a little more height.  And those crazy oranges grew and grew.  Long about July they turned light orange.  Not much longer to wait, I thought to myself. 

Wrong.  They kept growing.  The poor stick branches began to droop holding up such weight.  Let’s give it a little more time, I reasoned.  Surely they’ll turn dark orange any day now.  Right?

That was two months ago.  I am now willing to admit the error of my ways.  First of all, I am not convinced I purchased four different fruit trees, as labeled, from Lowe’s on special.  I have a sneaking suspicion these are the ones whose grafts failed and Lowe’s had to dump them on unsuspecting gardeners, like me.  If I’m really honest, I will admit that three of the four trees I bought have wicked sharp spikes protruding from various branches, which I’ve now come to learn are evidence of rootstock suckers overwhelming the graft. 

I am also willing to admit that I am not about to harvest two Mandarin oranges.  What is growing appears to be two rock-hard mutant oranges that bear no resemblance to a Mandarin whatsoever.  They don’t have that thick, bumpy, dark orange skin with a cute dimple at the stem.  These are pale, shiny and hard, like Christmas ornaments.  In fact, the poor tree looks like something Charlie Brown would have purchased.  I might just throw some holiday lights on it and see if that improves things.  I can’t imagine what else to do, since I’ve also learned that the fruit that has been developing for nearly nine months is inedible.  It is called a ‘sour orange’, in fact. 

Time to start over, I say.  But this time, I’ll head to the nursery instead of the bargain close-out shelf at Lowe’s!


Monday, October 22, 2012

Spring Orange


As I paint spring blossoms I am thinking about the color orange and how different it looks in the spring and fall.  Orange in the springtime is fresh and light and paper thin.  You see it in Narcissus and sometimes tulips and here, in my azalea.  It can be almost transparent and has a delicate quality easy to spoil.    In painting spring orange, I have to hold myself back.  Stop messing about.  Too much paint and the dreaded 'muddy look' sets in.
 
But fall orange is another matter.  Fall orange is a vivid leaf color.  If you see it in petals, it is on a sturdy, bold plant like a chrysanthemum or a late blooming marigold or zinnia.  It is loud and holds its own in the landscape.  It shouts, "Hey look at me!",  especially when the backdrop is a bright blue, cloudless sky.  The contrast is so vibrant you have to stop what you are doing and take a good long look.  You can't overdo it painting a fall shade of orange.
 
This spring blooming azalea, on the other hand, cheerily greets passersby, though shuns center stage.  It might get a nod or a quick mention, "How pretty!".  It gracefully bows and nods in the breeze, and adds to the spring palette of sweetness and light.  Remember back to April?  When the forest looked like Bambi just passed through?  That is the orange I'm trying to capture. 
 
Color memory is a marvel. 


Thursday, October 18, 2012

Painting Distraction


Making progress, for sure, but I'm having trouble concentrating due to the color change riot happening outside my studio window:
 

I'm sorry, the Winter Wonderland thing is totally over-rated.  THIS is worth staring at for an undisclosed length of time.  I mean really, you can see the wind, or the effect of it anyway.  You can see thousands of individual leaves.  If you sit and stare long enough, and I'm not necessarily advocating this, you can see the colors shift right before your very eyes.  This view is yellower than it was this morning.  There's more brown, too.  There's more orange, pink and red.  I see more branches.  And it's an overcast day.  You should see it when the sun is shining!

Ah well, back to painting.  I think I am entering the final stretch, thankfully.  Just this last cluster to go, and then more work on some of the fine detail and shaddows.  Plus the branch needs to come to life, perhaps with the addition of a warm brown.  The end is in sight!

Onward!

Tuesday, October 16, 2012

The morning sun


The thing I am conscious of today as I paint is the way the sunlight falls on this flame azalea branch.  It is morning.  The light is clean and pure.  It filters through the high canopy of poplar trees and falls at a slant on this shrub.  I like the glowing quality of light in the morning and I'm trying to capture it here.  It isn't the harsh contrasts of high noon on a bright day.  Nor is it the long shadows and golden glow of a late afternoon.  No, morning light in the understory is calm and quiet, like a whisper.  It says, "Psst!  Look over here!  Something beautiful is coming to life!"

Monday, October 15, 2012

Seeing color


So it is October.  Fall is setting in.  It's my favorite time of year.  Soon the woods will be ablaze with yellow tulip poplar and hickory leaves.  Specimen maple trees will begin to burn bright red from the top down. Yet even now, before fall's full glory sets in,  I love that sense of nature yielding to the inevitable ebb of life as summer's green gives way to the earth tones of fall.


The other day after Andrew read one of my recent blog posts, he said, "Mom, I would love to see the world through your eyes.  You see beauty everywhere!"  I have to say he's right.  In a word, what I see is color.  The arrangement and juxtaposition of color excites me.  Looking at the world, I think to myself what colors make up this or that?  What is the contrasting color next to it?  In the shadows?  How did God come up with that color?? 


As I mix and swirl pigments around on my palette, my thoughts go to my Granna, my dad's mom.  To be honest, I get my creative genes from both sides of the family: my mom is very artistic and she inherited her eye for beauty from her parents, both of whom had a fabulous Asian-inspired aesthetic sense.  Though my artistic gifts came from all of them, I credit Granna for actually teaching me how to draw.  How to mix colors.  How to see like an artist.


Granna was an oil painter.  She did Impressionist style still lifes and portraits brilliant with color. She'd fearlessly slather paint on the canvas with palette knives.  I don't even know if she ever used brushes.  Like Monet and van Gough, she'd lay one color down after the next, and turn those blobs of paint into vegetables piled on a chair.  Or peonies in an enormous vase.  Or my Aunt Karen in her pretty yellow dress.


My family would travel every year to my grandparents' house for Thanksgiving. Granna rarely painted when we visited . . . she was too busy being an amazing Granna.  You know, the kind that always had a cookie jar full of fresh oatmeal raisin cookies for just any old time you felt like eating one.  A big stack of children's books from the library, ready for story time.  Newly repurposed dress-ups salvaged from trunks in the attic.  And best of all, a brand new 64-pack of Crayola crayons and our very own pads of drawing paper set out on the children's project table in the sun room.  She'd give us art lessons if we asked her. And lovingly praise us for our efforts.


So I give thanks to Granna for setting me off on this journey.  She died when I was 18 and never knew the artist I have become.  And yet I like to think she's looking over my shoulder as I paint.  Saying in her soft, age-crackled voice, "Oh, just look at the colors!" the way she always did.  Reminding me to look up, look out at the world.  See with an artist's eye.


Life really is beautiful.


Thursday, October 11, 2012

Flame Azalea ballet


I am going to stop counting painting days in my blog post titles.  After a while, it gets to be a sore reminder.  I can hear you saying, She's still working on that thing?  Again with the flame azalea?!  Hasn't she about got that done already?  Really, your patience is remarkable! 

Fear not.  I am getting somewhere!  I'm well in to the second flower cluster.  This one is at the bud stage, nearly about to burst open.  I love how the buds all spring up together from the center of the cluster, all facing up and in, like birdies in the nest.  In real life, suddenly and soon they would open and fan outward, like the cluster in the foreground.  If I could have captured this with slow motion photography, it would look like a gracefully choreographed ballet.

I am not going to take the detail too much further with this cluster right now.  I have explained before about utilizing an "atmospheric fade" to accentuate the depth of field.  I want to preserve the possibility of using an atmospheric fade until I've painted every element of the composition.  Then I can figure out the right thing to do. 

Onward!

Thursday, October 4, 2012

Flame Azalea - 13

I learned something today.  I went online to order some more paint from my favorite online art supply, Dick Blick Art Materials, and I noticed strange icons next to the cadmium paints.  Turns out these were environmental and health hazard warnings.  Caution, caution, caution must be used when using these products!  They are toxic!  They are carcinogenic!  Yikes!  It is true.  Cadmium is a highly toxic substance and 2,000 tons of it are used annually in colored cadmium pigments.  Brilliantly colored, with good permanence and tinting power, the cadmium colors gained quick popularity when they were introduced, replacing vermilion which is very fugitive (quick to fade).  But are these wonderful attributes worth the risk of coming in contact with them at the artist table?  It turns out much of the risk can be avoided by taking normal precautions.  Don't breathe the vapors, don't get it on your skin, don't lick the paintbrush, wash your hands, etc.  Well I think I'm OK.  Unlike oil paint, which is extremely messy in my opinion, watercolor is a neat medium, especially the dry brush methods I use.  Unless I have a fight with the cap of an old paint tube that refuses to loosen up and unscrew, I stay pretty well clean and paint-free.  So I went ahead and placed my order.  Onward!

Wednesday, October 3, 2012

Flame Azalea - 12

I cannot see the forest for the trees.  Or in this case, I cannot see the flower cluster for all the petals.  I can only see edges, fine shaddows, layers, filaments, and strange colors that are not orange and not yellow.  Time to step back and try to see it as you do: a Whole Thing.  Interestingly, the best way for me to do this is to put a frame around it.  I look at the painting through the lens of my camera.  And somehow, surrounded by a crisp, black rectangle, the form reveals itself.  Oh there it is!  Beginning to turn in space and take shape there at the end of the branch.  There's a long way to go yet, but it is coming. . . . Isn't it?

Tuesday, October 2, 2012

Flame Azalea - 11

Today I am thinking about creativity.  The act of creating.  From this:


To this:

 
I go along day by day describing to you the technical details of how I paint a picture, inching along step by slow step.  First this, then that.  But also realize what is happening at the tip of my paintbrush.  Blobs of paint are doused with water, swished around and mixed with other colors, and put to use on a piece of paper.  A formless puddle of paint becomes the petal of a blossom, the nub of a new leaf shoot.  Telling the story of the life of this little shrub in my front yard.  Not to overdramatize things, but I like to pause every now and then, and think about the 'what' instead of the  'how'.  Touch base with my right brain.  Remind myself of the wonder of it all.  There is a color palette for every living thing, really.  What are you painting today with the palette that is you?

Thursday, September 27, 2012

Flame Azalea - 9

Today I got my color palette organized.  Chiefly I'm using Cadmium Yellow, Cadmium Scarlet, and Ultramarine Blue. I started to work on the blossoms to the right.  I chose this spot to begin because I am left-handed, and tend to be on the messy side.  Working right to left often minimizes the chance for my left hand to cause any disasters smudging newly applied paint.   So far so good, though I am uncovering several challenges I hadn't anticipated.  For starters, flower petals are nearly transparent.  And these petals are a pale yellow-orange.  Yellow can get too heavy really fast if you don't watch it.  So I run the risk that the transparency will be lost unless I use very very thin washes of paint. Also, yellow (and therefore yellow-orange) is really difficult to shade without turning the thing icky green. The blossoms on the right side of this particular bunch are fully in shadow, and so I am working out how to get them to look darker and yet still orange and transparent.  Hmmmm... What do you think?  I'm going to keep working around the composition to build everything up evenly and will come back to this area later. 

Here's a close up of work thus far:


And here's what the whole piece looks like today:


I know, that far right petal is too blue.  Sticks out like a sore thumb.  Not to worry; I can fix that (she says confidently!)  Stay tuned!


Tuesday, September 18, 2012

Flame Azalea - 8

The "tea wash" stage . . .  I've laid down a very pale cadmium yellow wash over the blossom and leaf areas, and a pale cadmium scarlet wash over the stem area of the painting.  This helps so much to finally see the image sit on top of the paper.  Unfortunately, because it is so pale you won't be able to really see what I've done.  But stay with me . . . before you know it a graceful azalea branch will start to 'grow' out of the paper!  I am realizing what a complicated painting this is, with translucent yellow-orange petals laying on top of one another.  What was I thinking?!

Wednesday, September 12, 2012

Flame Azalea - 7

Well, I've changed my mind.  Remember the issue I mentioned last post about painting the pale stamen on top of the darker petals?  I was marching assuredly along with my Stamen Solution and suddenly realized I was headed for Trouble.  Even though I tried to draw thin, fine lines with the liquid mask pen, what I ended up with was not that.  I ended up with sketchy lines that ended in blobs of goo.  I thought I could eventually paint around (and thereby shrink) the larger than necessary white lines.  In the end I realized that this would make the stamen look outlined.  I don't know whether you can follow this, but at any rate, I realized there is a better way.  I will use white gouache paint to add the stamen on top of the petals.  Gouache is opaque; and though water-based, isn't normally considered a true watercolor paint.  But watercolor artists use white gouache in just such circumstances, when there really isn't any other way to get the job done.  So after I complete the petals, I'll go back in with white to paint the stamen.  Then when that dries, I can add a transparent layer of just the right shade of pale yellow/green.  Sound like a plan?  (I don't have an image to share with this post, since the Plan is in my head and what is now on paper is an absence of liquid mask goo.)

Onward!

Monday, September 10, 2012

Flame Azalea - 6


OK.  Today really is the first day of the rest of my life.  I begin a new schedule, which includes time every day to be creative!  Happy me.  I begin where I left off with my neglected azalea sketch.  The first thing to accomplish is to get it transfered to watercolor paper.  Since it is a complex drawing, this takes a little doing.

The first thing to notice about the flower clusters  - from a technical standpoint -is that the stamen, (which are very very pale yellow, practically white) pop out in front of the flower petals, which are orange.  Since you can't paint white on top of another color in watercolors, the only way to do this is by using masking fluid.  Masking fluid is sort of like rubber cement.  I paint it on wherever I want the paper to stay white.  It dries and creates a safe barrier.  Then I will carry on with the painting, and when the underlying areas are done and dry, I will remove the mask and like magic, the little white stamen will pop out.  That's the theory anyway! 

Here is a photo showing my original pencil sketch (above), a pen tracing of the main outlines (on the right) which I used to transfer the design, and the watercolor paper (below) with the faintly drawn image and the masking fluid already applied.  Can you see the blue lines?  That is the mask.  I found a product that has a pen nib at the top of the bottle, so that I could draw fairly thin lines.  It was much easier than trying to paint it.  Imagine painting with rubber cement.  It is a nightmare and I was glad I could avoid it!

Because of the mask, I will have to paint this piece a little differently.  Normally I like to build up all parts of the composition at the same time.  However the mask cannot ramain on the paper long, and I need to try to hurry to completely finish the areas behind the mask first.  If I wait too long, the mask material will start to fuse permanently with my paper and the painting will be ruined.  How long is "too long"?  According to the manufacturer, that is 24-48 hours!  Yikes!  I guess you know where you can find me tomorrow!!


Friday, August 31, 2012

And so it goes . . .

I am embarassed to notice that an entire month has elapsed since my last post.  Ah well, I do have a few good excuses.  In the last month we've hosted a family reunion, attended another one, endured a car accident (totaled the car, but no injuries thankfully!), nursed our old dog through another down spell, and sent Henry, our youngest, off to college.  I am just now recovering.

At least Andrew, our oldest, is back home.  Politicians eager for my vote are decrying the statistic that more than 50% of recent college graduates are unemployed or underemployed and have moved back in with their parents.  This is shocking for sure, but I am here to tell you we view Andrew's temporary residence in our basement as a great blessing.  He is writing and recording his music, underemployed as a bartender and SAT tutor, saving his money and industriously preparing for a move to New York.  He is also saving me from flat-out depression.  I mean it.  If it weren't for his cheerful presence in our home, I know I'd wander aimlessly from room to empty room, wondering what will become of me now that my Stay-At-Home-Mom gig has ended.  His daily singing and practicing is a balm that soothes more than he can know. And his dedication to his passion is inspiring.

And so I gingerly pick up where I left off.  I find my drawing pen and remind myself what I can do with it.  I doodle and dream.  And somewhere along in there I head up to Henry's room, pen and paper in hand, and visit his turtle, Franklin.  Poor old Franklin, abandoned in this room that looks like the Grinch has just departed.  Dresser drawers are empty and a bit askew, forgotten clothes hangers litter the floor, stray bits of tape mark the spots on the walls where favorite posters used to hang.  There are no more piles of dirty athletic clothes and school books and golf balls and candy wrappes and a backpack spilling its contents on the floor. Uncharacteristically, the bed is made and the desk is tidy.  The emptiness haunts me. 

Yet in the act of drawing, I am refreshed.  Most times I draw because I have something joyful to give, some beautiful thing inside that wants to be expressed.  But sometimes I draw to heal.  I am looking for that quiet place where bliss abides .  What a gift it is to find peace.  Another reason to be grateful for this journey!  A wonderful adventure awaits if I keep pencil or paintbrush in hand and persevere.   And so it goes . . .

Tuesday, July 31, 2012

Flame azalea - 5

More of the same today, finishing the tonal drawing of the azalea composition.  Here's how it turned out:


One tricky thing I encountered was the lighting.  As you may recall, this subject is a composite of several actual blossoming stems that I put together on one imaginary branch.  It is botanically accurate and if I hunted around in my azalea bushes, I just might have found a branch just like this.  One thing I have to be sure to do to make it real and convincing is to make the light source consistent across all parts of the branch.  We have only one sun, after all.  In botanical work, by convention we paint the light source from above and over the left shoulder of the artist.  My source photos aren't this way at all, since these blossoms were on three different sides of the shrub, and therefore the shaddows are cast in different directions.  So as I drew them, I had to alter the shaddows to make it read the right way.  You can't really tell from this poor quality scan, but you might be able to notice that there is a lighter side and a darker side to the blossom clusters.  In the end, I hope it will look like I set up my easel and painted this branch at about 10:00 in the morning on a sunny day.  When you see this painting, I want you to be able to imagine the blue sky above, a gentle breeze setting the graceful flower stamens in motion, birds chirping all around.  Spring.

Monday, July 30, 2012

Flame azalea - 4

The next step is to do a tonal drawing to help me see the composition on paper.  What is petal, leaf and stem and what is negative space.  How all the petals turn and fold in the blossoms.  Can you imagine six or seven or eight girls with twirly tango skirts all twirling together and their skirts all overlapping, what that might look like?  That is basically what we are dealing with.  Azalea blossoms doing the flamenco.  So it helps a little to make a drawing that shows what is flower and what is not.  It isn't that pretty because it is all shades of gray; but that isn't the point.  The point is, this will help me make a convincing, accurate, beautiful painting!

So here is the tonal drawing so far:


The scan is lousy because it is a pencil drawing.  But maybe you can get the gist.  Enjoy!

Friday, July 27, 2012

Back to the Drawing Board

I know this expression says a lot.  Something doesn't work the way you thought it would?  Something doesn't go the way you planned?  Something unexpected happens?  It's back to the drawing board to try again.  For me and my art, I take this expression literally.  I have two places to work in my studio:  at my desk and at my drawing board table.  When I am at the beginning of a complex project, I spend time at my desk doing research and studying photos on my computer, and I doodle at the drawing board.  I bounce back and forth from table to desk as an idea is tested, tweaked, and discarded when a better idea emerges.  It is an essential stage because this is when I start to fully understand the nature of the thing I'm working on. How it grows. What is its character.  I go back to the drawing board again and again until eventually something clicks.  I've got a drawing in my mind that starts to work on paper.  I don't mind getting to a dead end and having to start over, because I am learning all the while.  And I know my end result will be better for all the trials it took to get there.  Sometimes I wish I could be this persevering in other aspects of my life, helping me overcome other barriers, real or imagined.  Ah well, at least in this arena I know what works.  I have to go back to go forward. 

Monday, July 16, 2012

Flame Azalea composition

OK so life got in the way of my Plan to Paint.  A strange wind storm two weeks ago left us without power for a week!  Then it took me a week to get things put back together (including myself).  For some reason that whole episode wiped me out and I had zero energy or inspiration to do anything creative.  Until today!


I know this doesn't look like much, but it represents two hours of work.  I'm trying to construct an interesting composition of the beautiful flame azalea just coming into bloom.  Of course, now in July, the flame azalea is just another bland green shrub, blending in with everything else.  But when it first comes in to flower, it is a real show stopper.  I've got lots of pictures and some sketches from back in May and June.  So today I am sketching branches and understanding how the shrub grows.  This way, I can create a branch from my photos and sketches that will be botanically accurate, even though it doesn't actually exist.  It sounds sort of sneaky, but it isn't.  It is art! As I've said before, it is in the composition that the botanical artist finds a channel for creative expression. 

I think now I've worked out in my head how I'd like to portray this specimen.  Let's see if I can get it to work on paper! 

Thursday, June 28, 2012

Flame Azalea

Time to begin a new painting!  Today I am starting to work on a flame azalea, a shrub which grows out by the road in front of my house.  I've sketched the blossoms before (see posts April 25 - May 10, 2011).  And now my friend, Daniel, has commissioned me to paint them! 

First, an introduction:


Isn't this beautiful?  Even with my finicky camera it looks great.  You should see some of Daniel's shots.  He's a terrific photographer and his photos are even more gorgeous.  Actually, I am not entirely sure why he wants a painting when he's got such lovely photos.  But a painting can reveal more of the soul of the thing, can't it?  And he has a sentimental fondness for flame azaleas, going back to his childhood home in South Carolina where his dad cultivated them.  So the challenge is set!

The flame azalea, also known as Rhododendron calendulaceum, is one of only15 native species which grow in the Eastern U.S.  (By comparison, plant enthusiasts have selectively bred azaleas for hundreds of years, yielding more than 10,000 hybrids!) It is one of the most spectacular native shrubs of the Appalachian Mountains and can be found from southern New York and Ohio south through the Appalachan Mountains to northern Georgia.  It has a wide range of color from clear yellow to oranges to brilliant red.  My shrubs are mostly yellow-orange to solid orange.  R. calendulaceum was first collected in 1795 from the Blue Ridge Mountains of North Carolina by Andre Michaux, the French botanist and explorer, but it has been around much longer.  This native species has been growing relatively undisturbed in the Appalachians for millions of years!

As for the plant's habit, this is what I've learned:  Like all native azaleas, it is a well-branched deciduous shrub.  This means it drops its leaves in the winter.  It is upright with spreading branches, about 5 to 10 feet high.  (My shrubs, which get absolutely no attention from me, are going on 50 years old and are about 6 - 8 feet tall.)  It is a naturally occuring tetraploid, having twice the number of chromasomes in comparision to other native species.  Because of this fact, it does not hybridize easily with most of the other natives.

The terminal inflorescense (the bunch of blossoms at the end of the stem) can contain  5 - 8 flowers, with the individual corolla (one blossom) varying from 2.5 - 4 cm. long to 3 - 5 cm. accross.  The corolla is openly funnel shaped, and the tube is the same length as the width of the petals, or slightly shorter.  The flowers have a prominant blotch (this is a horticultural term meaning a darker blotch of color at the center of the bloom) but are not fragrant.  The undersides of the leaves are pubescent (fuzzy), but not waxy white. The flowers open along with the leaves, or shortly thereafter.   

I could go on to describe more excruciating details about the morphology of this plant, but I will spare you.  It is stuff I need to know as I set out to draw it, but it really is pretty dry stuff!  Let's just agree that it is a wonderful subject to paint and worthy of its distinction in 2000 as Virginia's "Wildflower of the Year".    Onward!

(p.s. for your amusement, I have also posted some more musings "around the house" and "on other stuff".  Check out the links to the right.)

Friday, June 8, 2012

Post #101!

I just discovered that I have published 100 posts on this blog!  Sounds like a milestone, doesn't it?  For a project that I wasn't at all sure I'd stick with, I'd say it has been a success.  Thanks to all of you who have followed me thus far!  No telling where this thing is going . . . I'm open to suggestions!

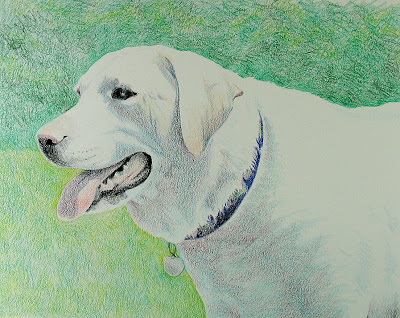
So it seems appropriate to post a dog theme on day 101.  It isn't dalmations, but it is cute, nonetheless.  This is the finished portrait of Ginger, biscuits and all.  Enjoy!

Wednesday, June 6, 2012

Dog biscuits galore!


If you were a dog, wouldn't you love to have your portrait surrounded by a pile of crunchy treats?  Ginger is the sort of dog who is completely and totally motivated by food, even at her advanced age.  She's always been easy to train, as long as there's a biscuit waiting at the end of the task to be performed.  Every time we look at this drawing, we're going to say to ourselves, "Good girl, Ginger!"

Tuesday, June 5, 2012

Dog Doodle

Hello people!  I'm back!!  Both sons are officially graduated from their respective institutions and our daughter is safely ensconced in her study abroad program in Morocco.  Whew!  So I'm starting out with something easy.  Sort of a warm up, if you will.


I know.  You are thinking, wow, she's hit the bottom of the botanical barrel.  Drawing dog biscuits.  OK, so it isn't in any remote sense a botanical drawing.  Even if it is organic dog biscuits!  So why draw them?  Well, I'm finishing up my little project for Katie which was a drawing of Ginger, our dog (see May 7 post).  I thought it would be fun to draw some dog biscuits on the matting before I have it framed! 

Actually, it is a great drawing exercise for several reasons.  First, it is easy because it is practically impossible to mess up the color.  Dog biscuits are brown, after all.  The ever present worry of turning something muddy from incorrect color mixing just doesn't apply.  Also, the shape is very forgiving.  Dog biscuits are hard, crumbly, rounded, toothsome, crunchy things and so a precise, steady hand is not required in order to draw one successfully.  In fact, if you are a novice at drawing, I highly recommend trying to draw one!  Finally, whenever I get to draw something easy, I like to let the pencil do its thing and not think too much about it.  I can get in to a sort of zen state of non-thinking, which is really very refreshing.  I become the observer, watching with curiosity as the biscuit takes shape on the mat board.

In choosing my projects, most of the time I like to undertake a great challenge and then muster the perseverance and fortitude to see it through.  But at times like this, when my mental and emotional energy is flagging a bit, I find it satisfying just to color within the lines. Enjoy!

Monday, May 14, 2012

Artichoke - final


I'm off to the framer's with this one . . . I ordered the mat and frame last week, knowing it would be a tight turnaround.  It will be done just in the nick of time for the charity auction next Wednesday.  (If you are interested, check out Piedmont Council for the Arts.)  Working under such a hard deadline has been a good experience.  No time for messing about with this piece!  I'd say the result is satisfactory, wouldn't you?

Hope all moms had a very happy Mother's Day yesterday!  I sure did :)

I am heading into several weeks of nonstop family activity -- the two graduations are upon us!  So I will sign off for a bit.  Please check back in once June rolls around!  My next project is sure to please!

Saturday, May 12, 2012

Artichoke - day 5

Well folks, what do you think? I have a few minor touches to do here and there, but I think it's pretty well done! 


When Peter took a look at it, he was wondering about the little slits at the top of many of the leaves. Does it really look like that? In his mind, he didn't imagine those notches and slits. And truthfully, an artichoke fresh off the produce truck will have leaves more uniformly green and packed tight to the core. But this artichoke has been around a while. It had some age on it when I bought it. Such character!

Well, now that I'm almost done with the painting, I can tell you a little bit more about the humble artichoke. This funky thing that we eat is actually the unopened immature flower bud of a large plant that can grow to four or five feet tall and wide!  The spiny, pointed, green bracts (they look like leaves, but they are not technically called leaves) surround the hidden flower parts. The base of each bract and the large fleshy base or receptacle (artichoke “heart”) on which the flower and bracts are borne are fleshy and edible, as you well know. If the buds are allowed to mature and open, the resulting flowers are quite attractive, large, and fragrant.  They look like huge purple thistles (not surprising, since they are related!).  They are native to the Mediterranean, but they can now be grown in many regions, including Virginia!  Thomas Jefferson grew them successfully at Monticello, by the way.

Before I race off to have it framed, I will add the latin name, Cynara scolymus.  I think that adds a certain sophistication, don't you?  Enjoy!

Friday, May 11, 2012

Artichoke - day 4

It's amazing what a little red can do.  Until today, I was painting with lemon yellow, ultramarine blue and a touch of phthalo blue.  Just two thirds of the color wheel.  By adding red to the pallette, I can now get the full range of color, and a fuller depth of field.  You know and I know there is no red in an artichoke leaf really, but if you study the shape and shaddows, you'll see that actually there's a lot of red!  Red is the complementary color of green, which means it makes a terrific shaddow color for green, and also has the effect of intensifying the appearance of green next to it. (The opposite is true too, by the way, which is why the butcher puts parsley next to the steaks at the meat counter.)  Back to my artichoke, I've used some washes of red to suggest the roundness of the leaves, and indicate where one leaf tucks in behind another.  It is coming along!

Thursday, May 10, 2012

Artichoke - day 3

I made some nice progress today.   Once this painting is done and at the framer's, I'm going to explain why the artichoke is such a cool thing to paint.  The way its leaves are arranged is a perfect example of the Fibonacci sequence.  It is a mathematical explaination of why the leaves grow in perfect opposing spirals in order to maximize the number of leaves that can grow from the stalk.  Sadly, I'm in a pinch for time but I will explain more about this later.  It is the coolest thing and one of the reasons I was drawn to botanical art in the first place!  In the meantime, enjoy!


Wednesday, May 9, 2012

Artichoke - day 2

I got a good start today with painting the initial washes.  Tough to see on this scan, but I have laid down several layers of a cool lemon yellow, followed by the beginnings of a layer of ultramarine blue.  I am using the drybrush technique, meaning I apply each thin layer of paint to dry paper, rather than allowing the colors to blend and bleed together wet (which is called a 'wet-in-wet technique', by the way).  I'm also not mixing my greens beforehand on my pallette, which is what I normally do.  Thought I'd try something different.  I'm placing a layer of blue over a layer of yellow and letting the transparency of the watercolors do the 'mixing' for me.  I'll admit, it's a bit scary picking up the loaded paintbrush and applying blue paint, hoping the blue and yellow will do their thing on the paper and end up turning the artichoke green.  So far, so good.  The greens of an artichoke are actually quite cool, so I'll be applying even more cool blues to get the right effect.Onward!

Tuesday, May 8, 2012

Painting Under Pressure

Last month, we attended a charity dinner and auction at our kids' school.  Somewhere between the main course and the dessert, our friend George asked me whether I'd donate a painting to another charity auction event for an organization he's affiliated with.  I should tell you it is a fabulous arts organization and I was honored he asked me.  Was it the wine?  Was it the flattering way he asked?  Was it the fact that he is the president of the board of said organization?  Not sure, but I said yes.  Then I put it in the back of my mind, in the 'After April' file. 

So the other day, we received the invitation to this lovely charity event and auction, with a note of gratitude for my soon-to-be-donated painting.  This is the painting which I had filed away in the 'After April' part of my brain.  That is to say, I haven't done it yet!  As you will recall, I did no painting of any sort in April.  Unfortunately, I don't have a ready stash of framed work.  One day I will, but not yet anyway!  And many of my pieces I can't part with.  Not yet, anyway.  So it is back to the drawing board, literally, to create a fairly quick yet exceptional botanical piece of art that can be donated to a silent auction event on May 23.  Allowing time for framing, I have less than a week to get this done.  No worries.

I'll spare you the thought process and the dead ends and the many ideas I have rejected for one reason or another.  It is going to be a painting of an artichoke.  Solitary. Beautiful greens and burgundys.  The symmetry and geometry always appealing.  Should interest anyone who likes botanical art, and also those looking to fill a blank wall in the kitchen or powder room.  Not too large (obviously!) but not too small either.

So buckle up your seatbelts . . . here we go:

Monday, May 7, 2012

Drawing of Ginger - final

Here's my girl!  I finished.  And I'm happy with the way it turned out.  This definitely captures Ginger in her golden years.  On a happy day at the park.  Watching geese in the reservior and contemplating jumping in after them.  After chasing kite tails and snooping around for birthday picnic leftovers.  Living the good life . . .

Friday, May 4, 2012

back to Ginger

Maybe I should change the name of this blog:  Holly's Monthly Draw!  So embarassing.  I do have fairly good excuses why I haven't sat down to the drawing table in one month . . . two birthdays, one sick kid, two weekend trips to New Haven, extra TLC for children facing Very Large papers and exams, two groups of 40 students here for dinner (pot luck, thank goodness! It's an annual event - we have it down to a science.) , opening up the pool, spring garden chores, making plans for two graduations, . . .  You get the picture.  Nothing out of the ordinary and yet so much packed in to such a short time has meant that I have totally ignored sweet Ginger, looking at me as through a gauzy film on my drawing table.

So today was the day to jump back in.  Yipee!   Drawing with colored pencils is a bit like removing gauze from your subject, come to think of it.  I apply the layers of color so gradually and I try to work the whole piece at the same time, not just section by section.  In this way, my pooch will slowly but surely jump off the page.


The first thing to nail is her eye.  You get the eyes right and the rest is a piece of cake.  If you know Ginger you will agree that I've nailed it so far.  It is fun working with a white subject.  I'm building up shaddows to create her form, taking care to leave the highlighted white bits alone.   This is all I had time for today, but hey, it is better than nothing!

Wednesday, April 4, 2012

Happy Birthday Katie!!

Today is my birthday and also today marks the one year anniversary of this blog!  Yipee!!  But today is special for another reason... 21 years ago today I gave birth to my beautiful daughter Katie!  The best birthday present ever, I always tell her.  Since the 21st birthday is a Big Deal, I thought I'd make her a special drawing or painting to celebrate this milestone.  Life often gets in the way of my best laid plans, though, and I haven't been able to finish what I started.  So here is the beginnings of my drawing for Katiebug:


Well as you can plainly see, this is not in the slightest bit botanical.  It is, in fact, our dog Ginger.  Katie does love flowers, but she loves Ginger even more.  So I'm using my finely-honed colored pencil technique to do this pet portrait for my girl.  I hope you enjoy this little doggie detour.  It won't take long.

Fun fact: The absolute maximum number of helium-filled balloons that can fit in my car with me driving is 21.

Busy weekend ahead so there won't be much drawing time, I fear.  But don't give up on me . . . I have big plans for this second year of blogging :)

Tuesday, March 20, 2012

Hyacinth

With the arrival of Spring and everything suddenly bursting into bloom, I've been lured from my drawing table out into the yard.  Living Things in every corner of the garden are screaming -- Prune me! Weed me! Mulch me! Dig me up!  Plant me! Water me!  And how about a little fertilizer over here?!  They always say to get the peas planted by St. Patrick's Day (almost made it) and put the crabgrass control down on the lawn before the forsythia blossoms fall (ha! nailed that one!)  The list goes on and on . . . As many of you know full well, this is a busy time of year for any gardener.  Let's see, it's been almost a week of working outside and the toll thus far is: two tick bites, two splinters from the old rake, poison ivy from cleaning up last year's dead vines, and a tiny puncture wound from turning the compost pile.  Not too bad . . .

I was at Lowe's two days ago and they had pots of hyacinths for $1.99.  Who can resist that?  The flower stalks were just coming up through the leathery leaves, like big, fat asparagus.  I thought to myself, aw man I should paint that!  I'll catch them right as they are starting to bloom - so pretty!  I set the pot on the back porch and promptly forgot about it.  Well, this evening when I came in from mowing the lawn, I happened to glance at the pot.  All three bulbs are in full bloom!  Just like that!

I'm still going to do a painting - or perhaps a colored pencil drawing, even though I missed my opportunity to capture that 'just about to bloom' phase. These are gorgeous, and can't you almost smell them?  Wow what a fragrance!!  If I can bring myself to stay indoors long enough to paint, and if I'm not overpowered by the scent, this should be quite lovely.  Stay tuned!

Thursday, March 15, 2012

Three Bartlett Pears - final

I finished the third pear today - hooray! 


And so here is the full composition:


All that is missing is my signature!  And just so you know how grateful I am to have my drawings and color studies and photos of the original pears, here is my subject matter, slowly but surely collapsing into a puddle of pear mush on my drawing table: